Import G Suite Contacts in Outlook – Methods Only in 2 Steps
Intro: There are two methods explained in this article to import G Suite contacts in Outlook. Find the reasons to move the contacts to Outlook application. Keep up with the blog for all the information.
Without a doubt, cloud-based services are on the rise, with nearly all users migrating to them. Perhaps it’s because of the advanced features, improved security, or more space. The reasons may differ.
However, while both G Suite and Outlook offer great services and are excellent at what they do, an increasing number of users are gravitating toward Outlook.
G Suite is an ideal choice when the company is new and the number of employees is small. However, users export G Suite contacts in Outlook due to the growing number of employees and the company expanding because it provides:
- A professional, secure, and dependable infrastructure.
- Updates are made regularly.
- High levels of security and dependability.
When the users are migrating to Outlook, it is important to transfer all your important data as well, which you might need later.
Out of all the information being transferred, contact holds major importance.
Thus, in this article, we will focus on understanding an easy way to transfer all your contacts to Outlook.
Methods to Import G Suite Contacts in Outlook
There are 2 methods that a user can follow to import their contact list to Outlook:
The manual method has two steps in it and uses a built-in Google feature to export contact only from a single account.
You can perform the operation using the direct method, and export contacts from multiple G Suite user accounts at once.
Let’s first look at the direct method.
Stage 1- Export G Suite Contact in Outlook Via Conversion
This stage can be completed by using the best method offered by the tech-expert. Using this direct method -the Google Apps Backup Tool you can easily perform the process to import G Suite contacts in Outlook.
It is the most basic and easily understandable software for promptly downloading all of your G Suite Contact information.
You can use the software to get total control over the export process of transferring the Contacts of multiple user accounts to Outlook in batches. Contacts in this tool are by default saved in vCard file format.
Follow the below steps to download the contacts to Outlook data file.
Understand the Working Steps to Export G Suite Contacts in Outlook
Step 1– Install and Launch the tool on your system Click on the Activate button to start up the software.

Step 2– In the Setup tab, select G Suite as the Source platform and Outlook as the Destination.

Step 3– Select the preferred category i.e. Contacts under the Workload Selection and apply filters as per requirements.
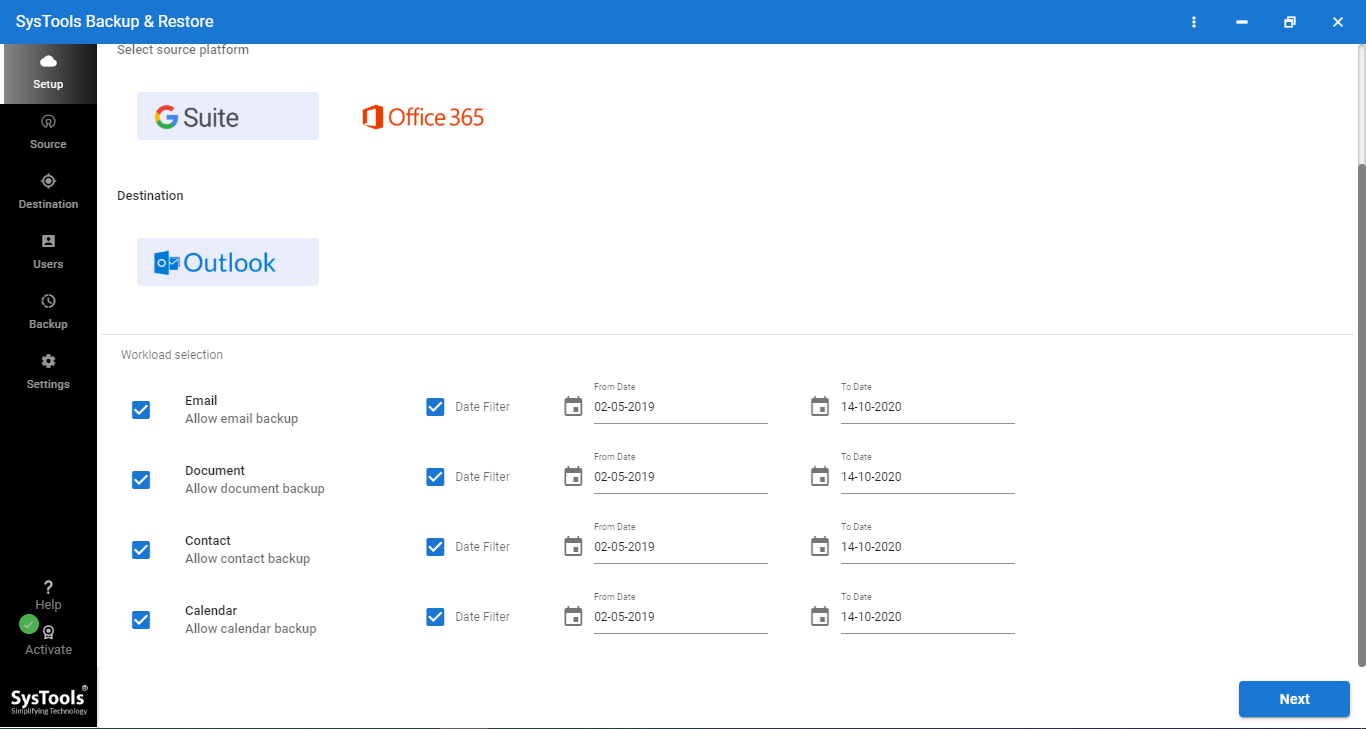
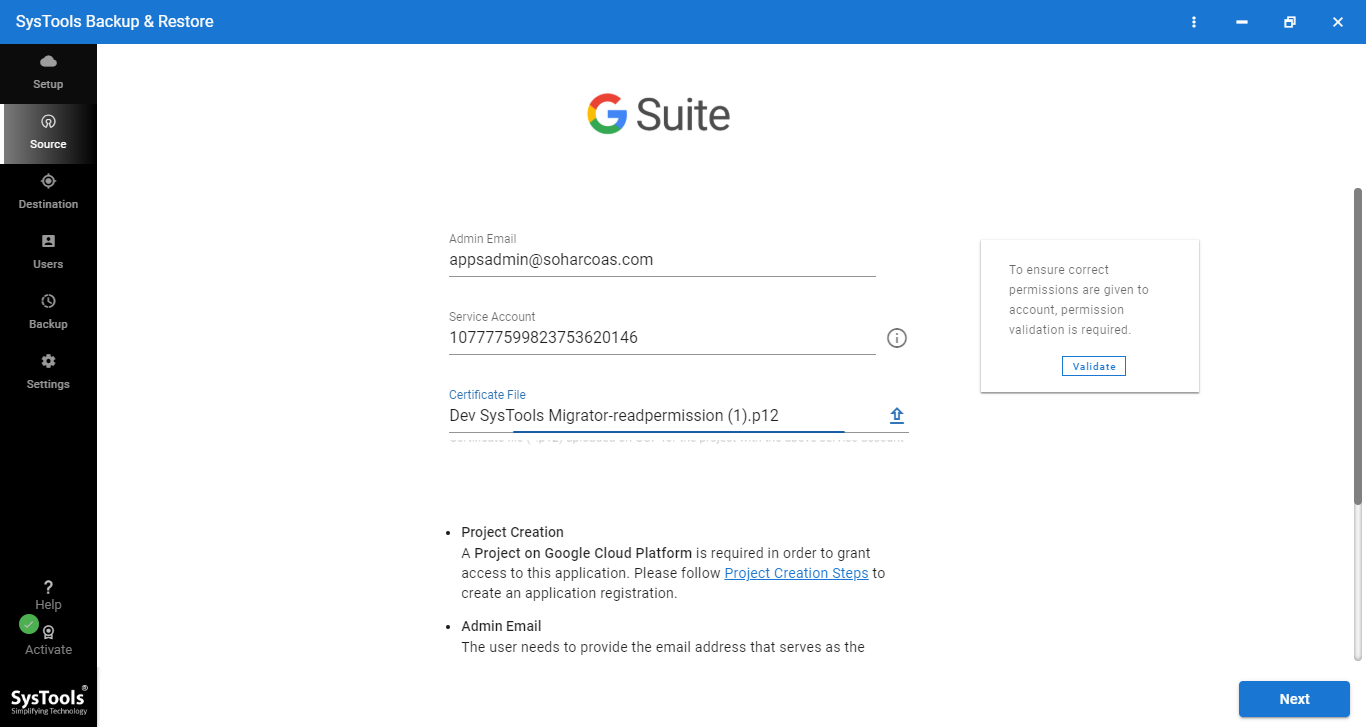
Step 4– Enter the G Suite admin email address, service account, and P12 key file from the saved location in the Source Window.
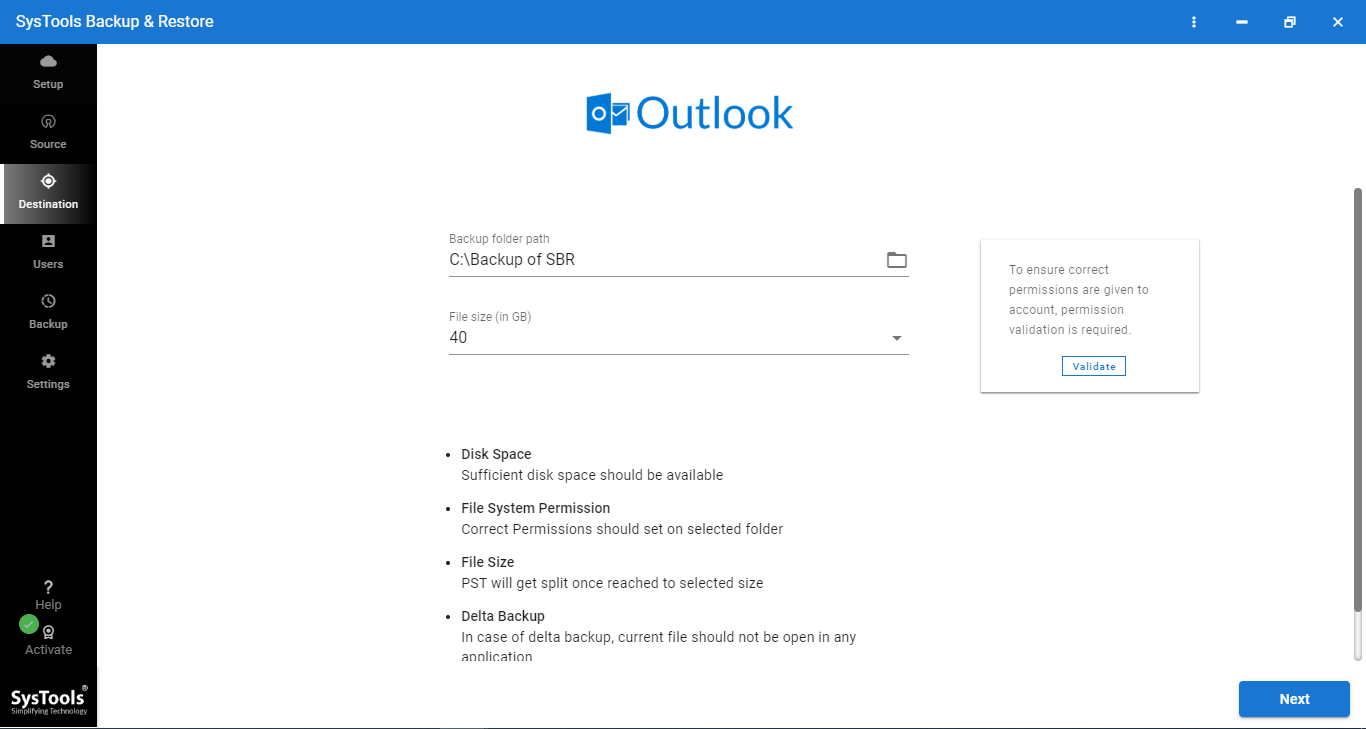
Step 5– To import G Suite contacts in Outlook, enter the destination location in Outlook and the size of the file.
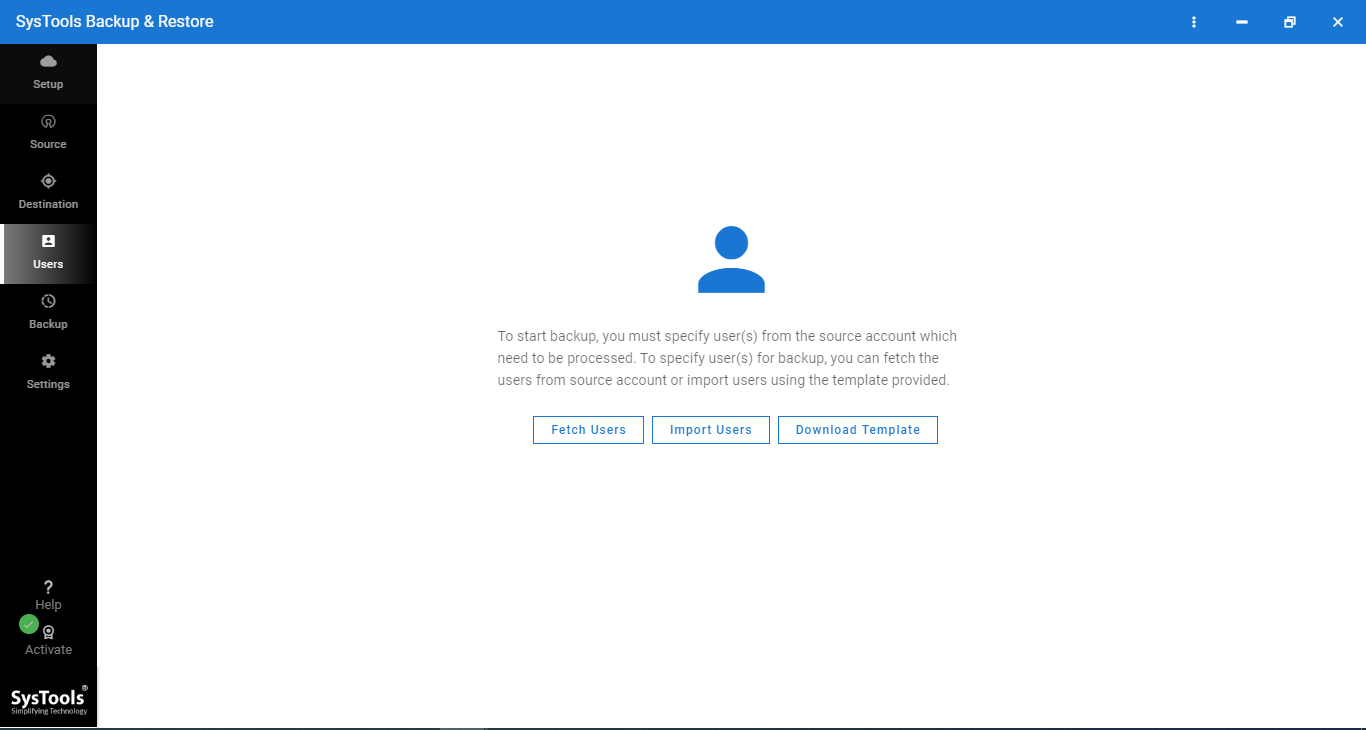
Step 6– Select the appropriate option to import the user list that needs to be processed.
Step 7– Validate the users and then click on the Start Migration button to migrate the contacts to Outlook.

Step 8– After the process is finished, click on the Download Report to save the detailed process report.
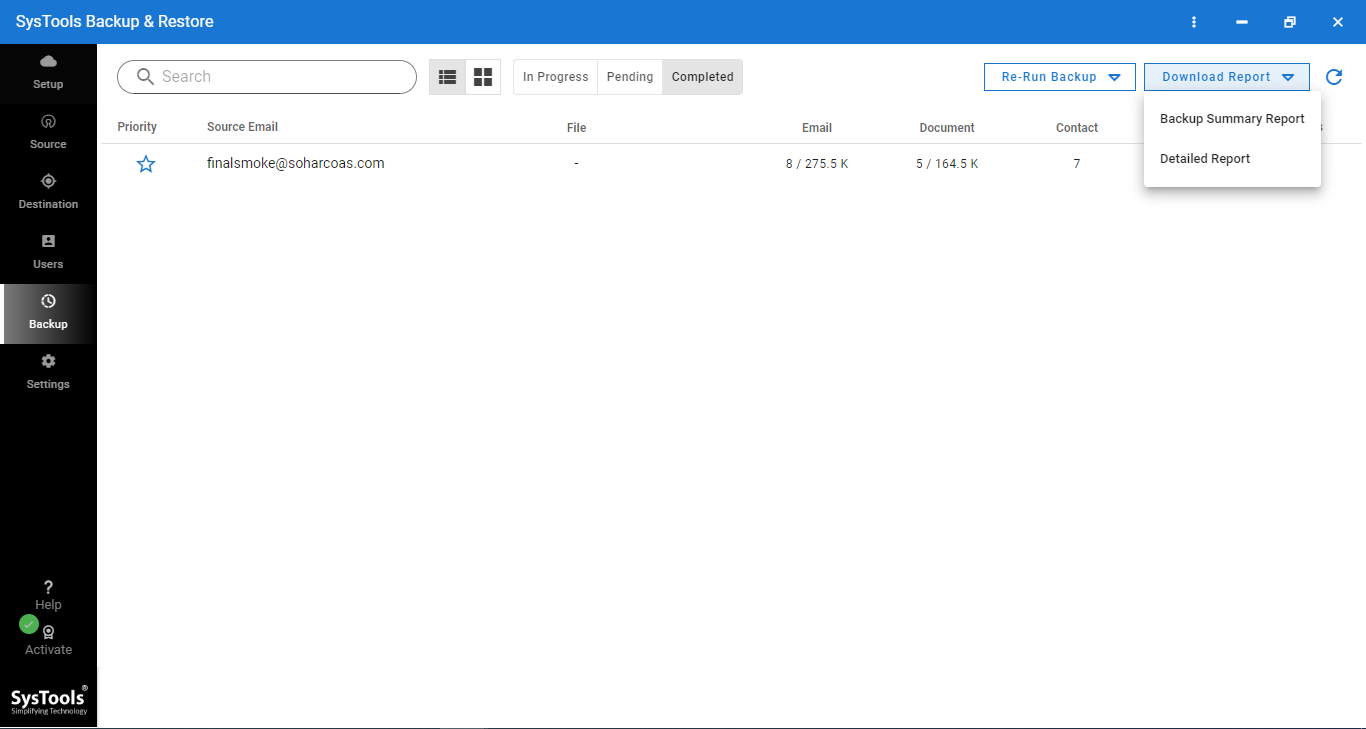
If you want to run the process again, click on the Re-Run Backup option. For exporting the contacts that have recently been added, click on the Delta Backup option after the first backup process.
Method 2 – Using the Manual Method to Import G Suite Contacts to Outlook
Step 1– Open your Gmail account and select Contacts from the menu.
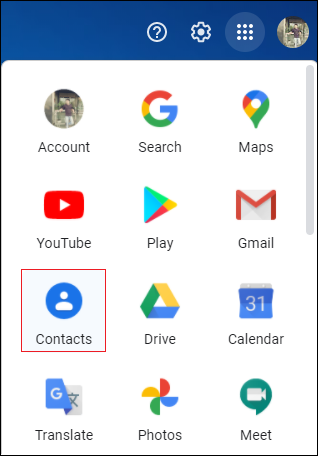
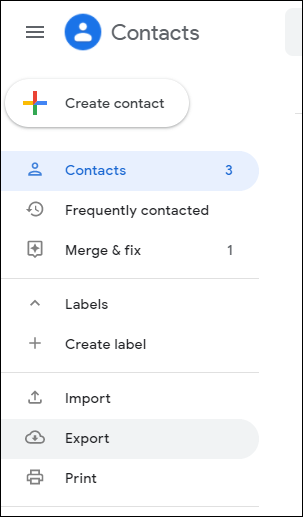
Step 2– After you’ve opened Contacts, go to the left panel and select Export.
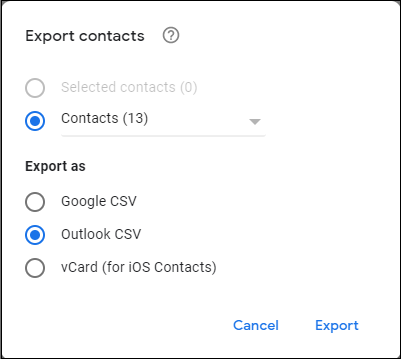
Step 3– A pop-up window will appear on the screen; select the type of contacts you want to export and the Outlook CSV export format, then click Export.
Step 4-The contacts will now be exported to your system in Outlook CSV format.
After exporting the contacts, you can import them to MS Outlook by following step 2.
Step 2- Importing Converted Contacts into Outlook
Note: To export G Suite contacts to Outlook, you have to install the specified MS Outlook application on your system.
Step 1– Open MS Outlook on your computer and navigate to the File tab.
Step 2-Choose the Open/Export option, then click on the Import/Export option.
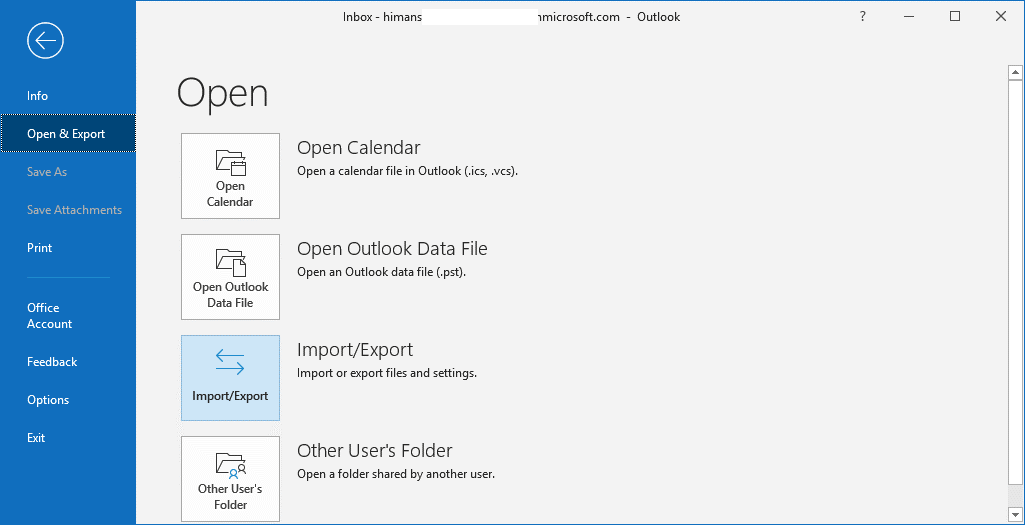
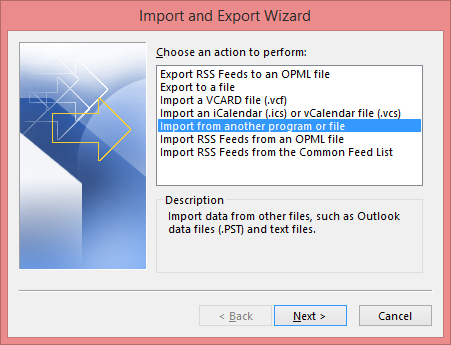
Step 3– Click Import from another program or file in the newly opened tab, then hit Next.
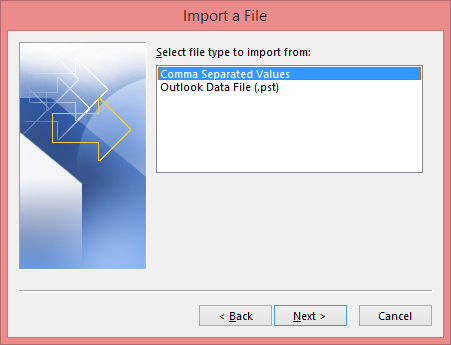
Step 4-Now, select the Comma Separated Values option and press the Next button.
Step 5– Click Browse and select the CSV file containing your Gmail contacts from the Import a File section.
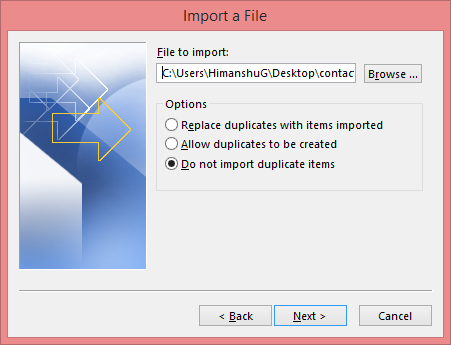
Step 6– Choose how you want to handle duplicate contacts during the process to import G Suite contacts in Outlook and click Next.
Step 7-In the next step, select the Contacts folder in your Outlook mailbox and click Next and then click Finish.
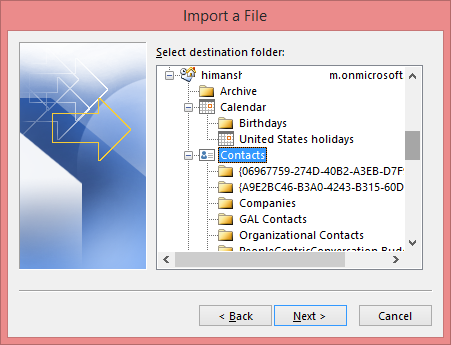
Outlook will import all of the contacts from the .CSV file, and you can view them in your mailbox.
To view your contacts in Microsoft Outlook, go to the Address Book and then click Contacts. It will show you all of your contacts in Outlook, including those you’ve recently imported.
Although, there are a few limitations brought along with the manual method.
Complications with Manual Method to Export G Suite Contacts in Outlook
- The manual method is only applicable to one account at a time.
- Even after following all of the migration steps correctly, users are unable to view their contacts in Outlook at times due to the file size.
- If a user attempts to import more than 2000 contacts to Outlook, an error message appears. This method does not allow the user to bulk import contacts in MS Outlook.
Concluding Words
The step-by-step methods are explained in this article using two methods to import G Suite contacts in Outlook.
The first is the tool, and the second is a manual method for exporting the contacts. You can use whichever method you prefer, but the direct method is recommended because it is free of flaws.